Thursday, December 24, 2015

New torque rods

I ordered new torque rods & polyurethane bushes from Kelvedon Lotus in the UK. They look great, but needed some paint & primer:


Wednesday, December 23, 2015

2016 project list

Body:
  • Fix hole in passenger side footwell

Brake servo:
  • Install new brake servo hose
  • Rebuild brake servo

Front brakes:
  • Rebuild front calipers w/stainless steel pistons - paint gold

Rear brakes:
  • Rebuild rear brake calipers - paint gold
  • Fix reverse light switch in gearbox

Rear end:
  • Swap in 3.55 diff
  • Install new torque rods & bushes
  • Redline 75W90 gear oil
  • Install black new drive gear in transmission

Sills:
  • Remove interior and replace body reenforcement sills

Rear suspension:
  • Refurbish used bearing housings
  • Refinish springs
  • Install Konis & bump guards
  • Install new A-frames

Front suspension:
  • Remove front arms, paint, install new bushings
  • Install new bearings
  • Repaint roll-bar
  • Install new roll bar bushes

Thursday, December 17, 2015

New spinners on

My "knockoff spinner tool" arrived this week:


It's a nice piece of kit, available from:


After reading the instructions and grabbing my torque wrench, I installed new spinners on the car.


Sunday, November 29, 2015

Nose trim repair

The drivers side nose trim has a nasty dent in it. I found / purchased some replacement trim recently.


Another +2 spotted

Ran into a fellow +2 owner this afternoon. This is a 1967 model with 36,000 original miles!


Thursday, November 19, 2015

Getting ready for winter

I've been fighting a flu for the past few days, so no progress to report.

The Canadian weather is getting cold and car season is almost over. I've been doing some small maintenance tasks on the car: exercising the electric windows and the front headlights to keep them loose.

I will start making a list for 2016 projects soon.

Tuesday, November 17, 2015

Thursday, November 12, 2015

Odds & ends

I've purchased a number of 'original' parts recently.

A 4-speed shift knob:


And a Federal seat with headrest:


New soft mounts arrive

The new Weber soft mounts arrived today. Now I can get back to trouble-shooting the idle problem.


Friday, November 6, 2015

Idling problems

The car is starting on the first pull, but the engine will not idle at less than 1100 RPMs. I found a vacuum leak in the headlight system, and blocked off the brake servo, but a clear whistling noise can be heard.

Update: I took the carbs off and found three of the soft mount o-rings have failed (stretched). This is really frustrating since they are brand new - a special order item from the UK. I've ordered new soft mount kits, but they will take a week to get here...

Tuesday, October 27, 2015

She's a runner

After sitting for 28 years, and 1.5 years of restoration, I took the Lotus on it's maiden drive. It's running rough, but it completed it's first short journey.

Some pictures to mark the occasion:


Saturday, October 24, 2015

Accuspark to the rescue

After installing the new PowerLite starter motor, the Lotus would not fire. The engine would pop and splutter, but I discovered there was no spark on cylinders 1 and 4.

The absence of spark is probably my own fault. I knocked the Pertronix distributor cap askew while installing a NOS Smiths "oil pressure" sending unit last month. I ordered a new cap & rotor, but there is a 5 week wait!

A friend suggested I should try the Accuspark ignition system. They just released a Lucas 23D distributor / ignition kit that fits the Lotus Twin Cam engine, so I ordered one from: http://www.accuspark.co.uk/distributors.html

The kit arrived in 3 business days and took about 2 hours to install. It comes with a new distributor, wires, coil and spark plugs. You do need to solder low tension leads on, but installation is straight forward. The Lotus fired up on the third pull.

Thank you Accuspark!

Accuspark_instructions.pdf

Friday, October 9, 2015

New PowerLite starter motor

It's been ages since my last update. Rest assured, the +2 project is still ongoing...

At the beginning of September, I installed the rebuilt carbs and tried to start the car - only to find the new starter motor was making a terrible grinding noise. After checking the ring-gear, we determined the starter was dead so I ordered a new PowerLite unit from Kelvedon Lotus in the UK. It arrived this afternoon and my plan is to install it today.


Wednesday, August 26, 2015

3.55 differential complete

You might recall from earlier posts the 3.55 differential upgrade has been a piecemeal project. I purchased the (rebuilt) differential and output shafts from UK sellers, and a Lotus aluminum differential cover from a local enthusiast. Everything has been inspected, cleaned and repainted. Now it's time to put it all together.

A quick word about the output shafts. Many sources state it is important to reinstall the output shafts on the same side of the car because the splines are stressed in those directions. The seller was kind enough to mark the shafts with "N" (nearside) and "O" (offside). On this side of the pond, the nearside would be the passenger's side.

The first output shaft went in fairly easy. I used my finger to apply a liberal amount of grease inside the differential flanges, and around the outside of the bearings. A few light taps with a ball peen hammer and everything slide into place. The outside retaining clip snapped in.

The second output shaft took about an hour of gentle "persuasion" to install. I also had to use some touch-up paint because the hammer & ring pliers scraped the red off.

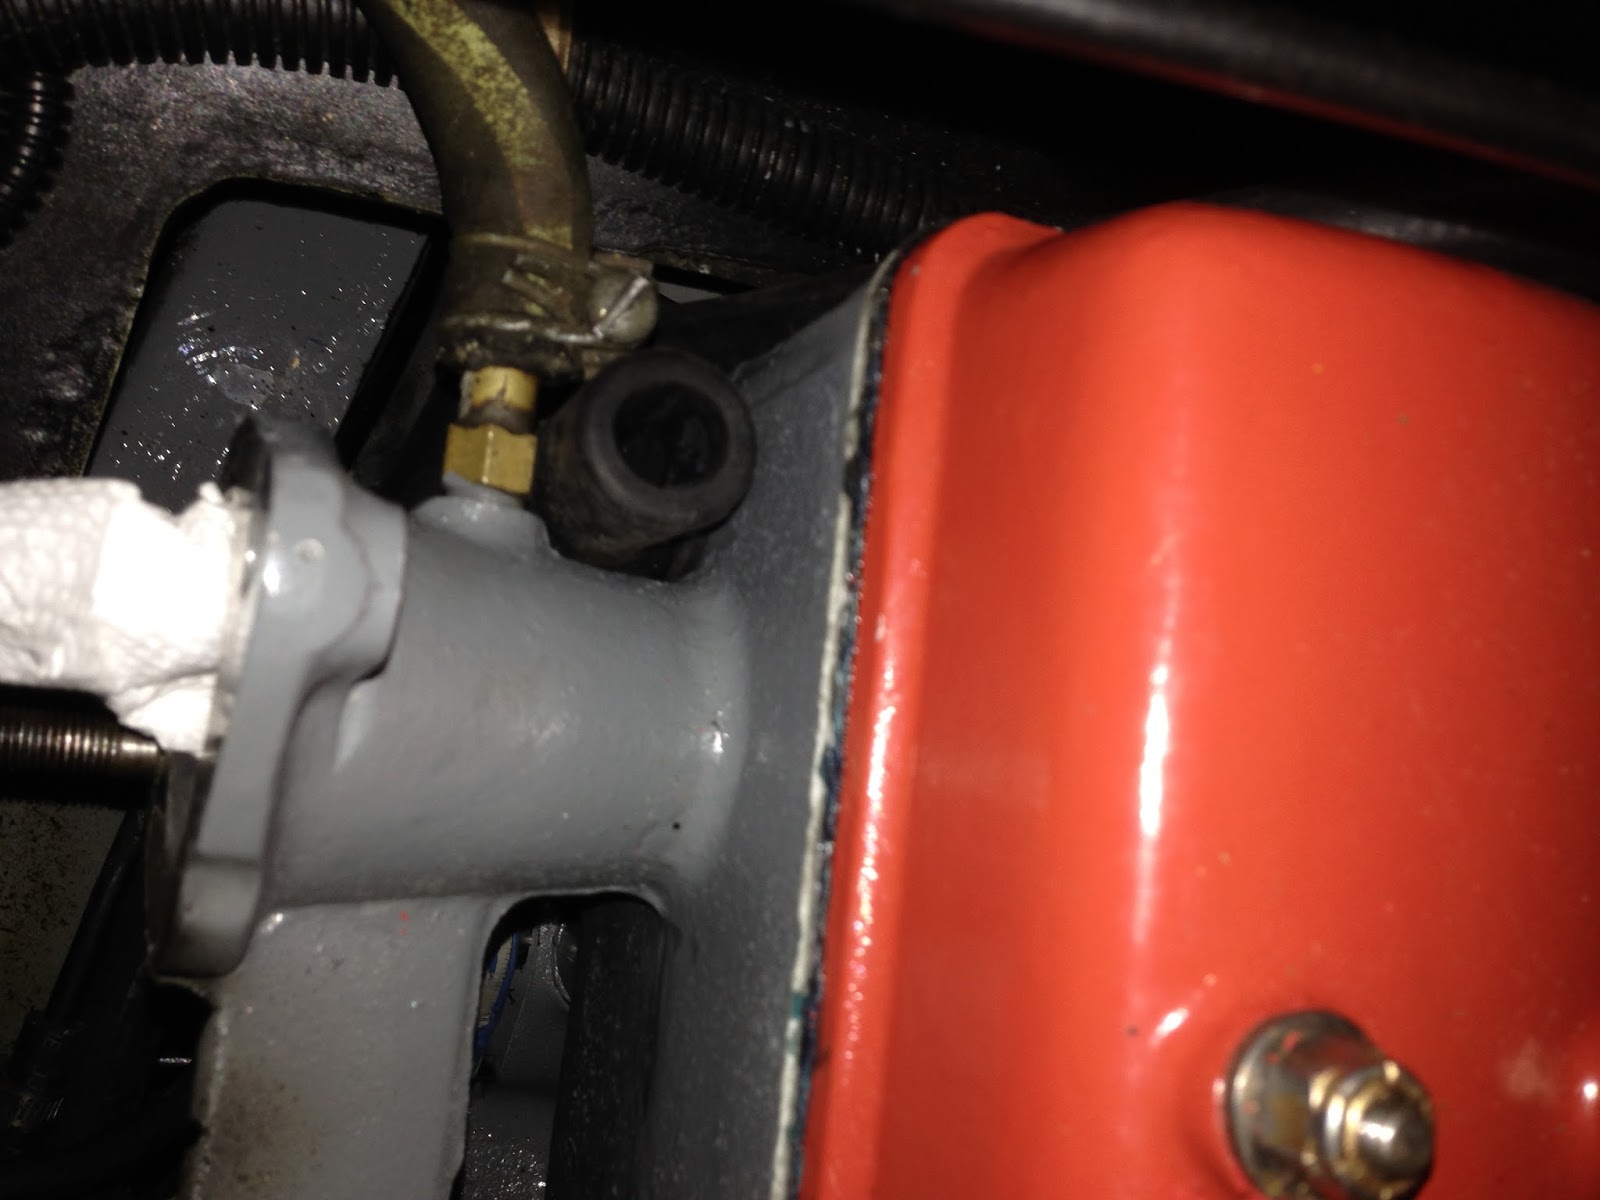
Here's the finished result:


I also painted and installed a chassis stiffening bar.


Another project complete & ready to go on the car.

Tuesday, August 25, 2015

Refurbishing the output shafts

I bought a small sandblasting / soda-blasting box this week. It makes setup & cleaning up much easier! My first project, the output shafts.

After soda-blasting & cleaning with Simply Green:


You will notice some flecks of red - the original color. The closest match I could find was Dupli-Color Radiant Fire; which I sprayed over two coats of rust proof primer:


Gently hammered new bearings on and installed inside retaining clip:


Friday, August 7, 2015

Tuesday, August 4, 2015

New jets & chokes in

Making a little progress on the car. The new Weber jets & chokes have been installed; and K&N filters are on.

I used the Lotus "Big Valve" (type D cam) specs:

Choke: 33 mm
Main jet: 120
Air correcting jet: 155
Slow running jet: 50 F8
Accelerator pump jet: 35
Accelerator pump stroke: 10 mm
Starter air jet: 100
Starter petrol jet: F.5 / 100
Emulsion tube: F 11
Needle valve: 1.75
Ram pipe length: 3.8 mm
Float levels: 8.5 mm & 15 mm (including gasket)

Sunday, July 19, 2015

Servicing the Webers

Disassembly:


Removed pin, floats & needle valve. After cleaning:


 New needle valve, gasket & floats:


Adjusted float levels with digital vernier gauge:


And back together.

Monday, July 13, 2015

Refurbishing the Weber soft mounts

The Weber soft-mounts needed some attention - you could see they were not making a good seal between the carburetors and intake manifold.

After soaking in Simply Green for a few hours, and some elbow-grease:


With new o-rings and mounting hardware: 


Ready to go back on.

Tuesday, July 7, 2015

Rejetting the Webers

I opened up the Webers last night. The floats look to be in decent shape, but the needle valves are badly worn and the Jets are undersized. I have a service kits for both carbs, but I will need to order new Jets & chokes.

Some interesting reading:

http://www.classicrallyclub.com.au/docs/Tips_tuning_Weber_carburettors_DVAndrews.pdf

Friday, July 3, 2015

Breather tube in

My previous attempt to install the oil breather tube ended in frustration. The rubber was too stiff and it would not squeeze into the block.

This time, I decided to employ heat and let the rubber soak in boiling water (from my Keurig machine). After three hours, it was easy to fit:


Now I need to find an oil catch tank and filter.

New oil pressure sending unit installation

1. Carbs off:


2. The original oil pressure sending unit:


3. New unit (part number 02505-00 / MEXICO):


Friday, June 19, 2015

More diff cover

After soda-blasting and soaking in Simply Green for 24hrs:


With self-etching primer:


It would have been nice to clear-coat the aluminum, for a "raw" look, but the cover had too many nicks and dings in it.

Final result:


Monday, June 8, 2015

Bad oil pressure sending unit & new diff cover

I had some (low) oil pressure drama last week: the pressure would climb to 15psi, stick there and then drop to nearly zero. After changing the oil and a lot of head scratching, I fiddled with the oil pressure sender unit and the gauge started registering normal (35-40psi) numbers. Then, of course, it stopped working again - so I ordered a new sender unit from Dave Bean.

I finally found a Lotus differential cover! One of the local Lotus club members had one and graciously sold it to me. It will be perfect for the 3.55 diff swap.

Before cleaning:


Sunday, May 17, 2015

New alternator bracket done (and installed)

With all the new parts on the car, I've had a few teething problems. 

One issue was the old alternator bracket. Someone butchered it when they upgraded the car from the generator to an alternator. It was ridiculously heavy and had clearance problems; causing the alternator to vibrate against the steering column.


Barry dropped by and provided a helping hand. 

We used the original Lotus alternator tensioner arm and made a new lower “F” bracket using two pieces of 5/8" steel. Each is drilled appropriately and bent into an "L" shape (see below). Everything is held together with grade 8 bolts and lock washers.

The combination of the old and new parts works perfectly - the car fired on the first pull and the voltage is steady.


\


So, I’m down to servicing the carbs & getting the new muffler on. Then I’ll take the car for it's inaugural drive.

Lotus Twin Cam "Run In" & maintenance advice from Miles Wilkins

From his Twin Cam book:

Never exceed 3000RPM, in any gear, for the first 1000 miles (1600kms). After that, increase 500 RPM for every 500 miles.

Change oil at 500 miles. Check chain & valve clearances.
...
Change oil every 3000 miles afterwards. Chain & valve clearances every 5000 miles.

Never run the engine in the winter, it does more harm than good. If you do, let it warm up and run for at least 30 minutes.

If the car is run very little, change the oil twice seasonally. The acids in oils will attack the bearings.

This will give 80,000-90,000 miles lifespan.

Wednesday, May 13, 2015

New coolant expansion / recovery bottle installed

My original coolant expansion / recovery bottle was too old and brittle to reuse. Like the radiator, Lotus borrowed this part from the Triumph Spitfire and replacements/reproductions are hard to find.

I wasted about four hours visiting auto parts stores & wrecking yards looking for a substitute bottle. Finally, I turned to eBay and found a non-pressurized "universal" part (http://www.ebay.ca/itm/161577174177?_trksid=p2057872.m2749.l2649&ssPageName=STRK%3AMEBIDX%3AIT).

The new coolant bottle arrived this week and it works great. It's made with quality plastic, comes with a zinc'd bracket and took about 15 minutes to install.

Wednesday, May 6, 2015

Refurbishing the spare tire bracket

A small project - saving the spare tire bracket. It was pretty rusty.


After a lot of sanding, self-etching primer and silver paint:


Saturday, May 2, 2015

Wheel drama

The tire shop called to say one of the wheels could not be balanced & another was marginal. Very frustrating after spending getting the wheels refurbished and tires mounted! So the hunt for new +2 steel wheels is on.

Thursday, April 30, 2015

Replaced drive peg & new tires on

Wheels & tires are back. Before they go on, I decided to replace the missing drive peg on the rear passenger side:


I left the peg in the freezer overnight, and it was a warm day, so it was easy to get started.


I used a 'D' clamp to drive the peg about 1/8". When it got stiff, I gently tapped it with a hammer (moving 1/64" at a time) to finish the job.

10 minutes later - job done, and new wheels and tires back on the car.